How to Install
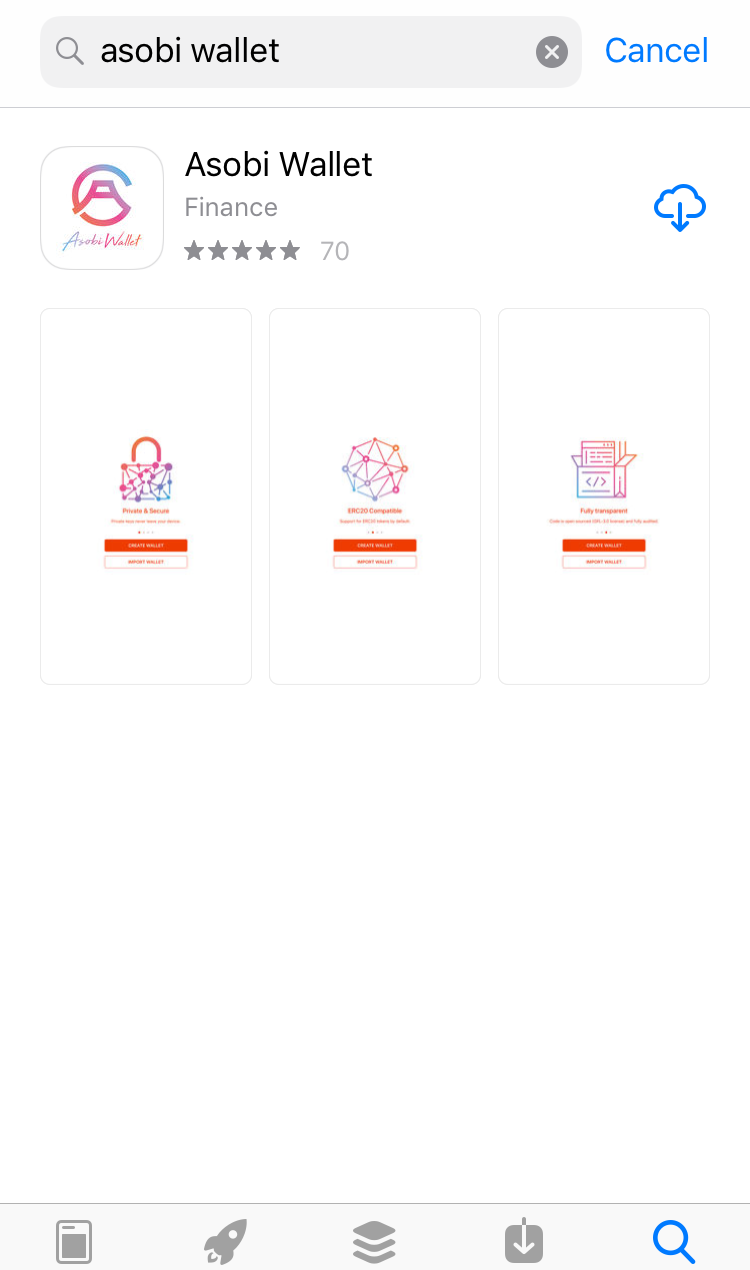
1. Download Asobi Wallet from the following address iOS Asobi Wallet
iOS Asobi Wallet
https://itunes.apple.com/us/app/asobi-wallet/id1435441596?mt=8
Android Asobi Wallet
https://play.google.com/store/apps/details?id=com.asobimo.asobiwallet
*Search Asobi Wallet at your Store
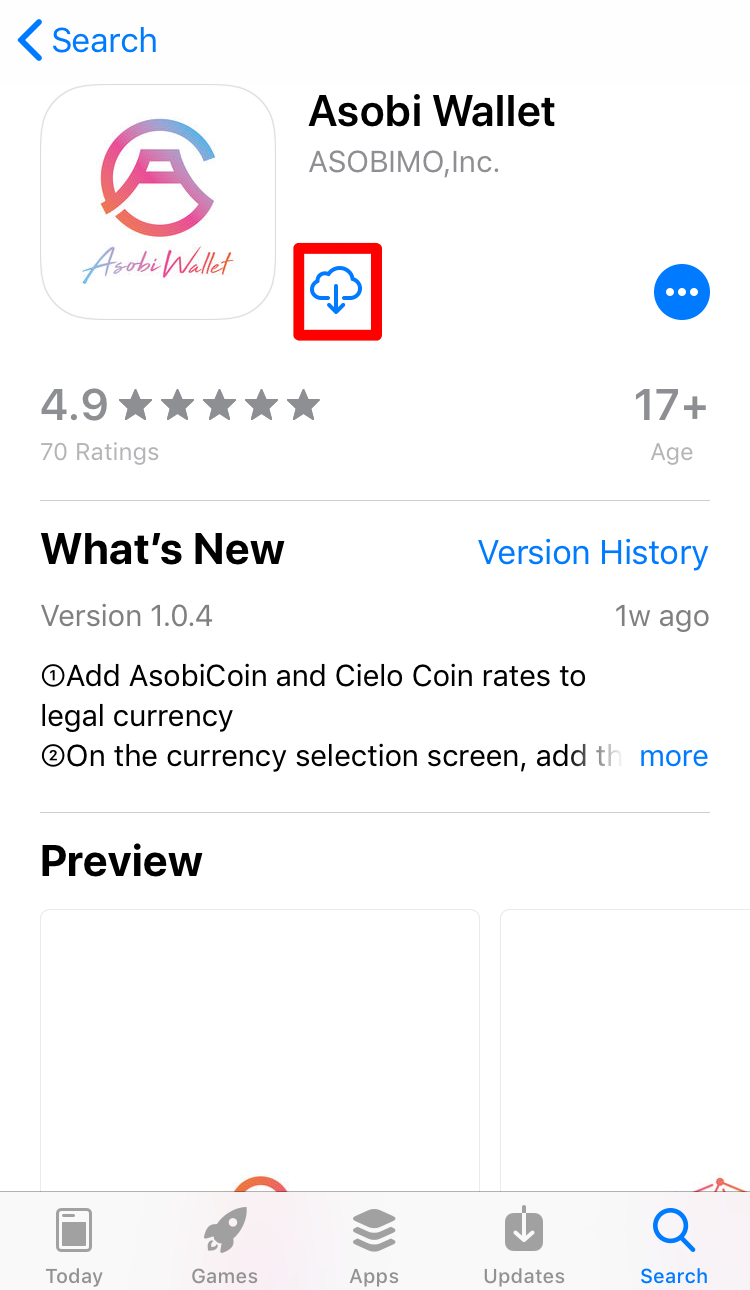
2. Tap Install and enter your Apple ID (Create a new Apple ID if you don’t have one.)
3. Press Install button.
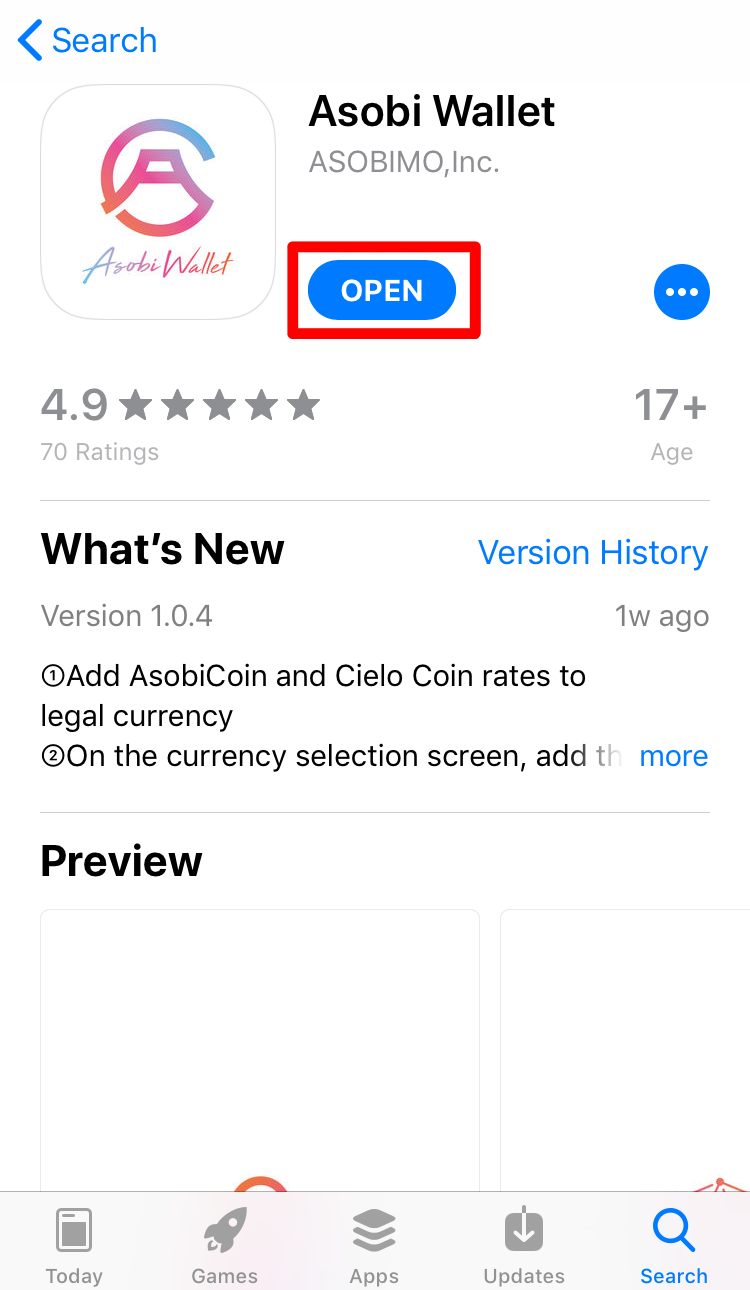
4. Press Open
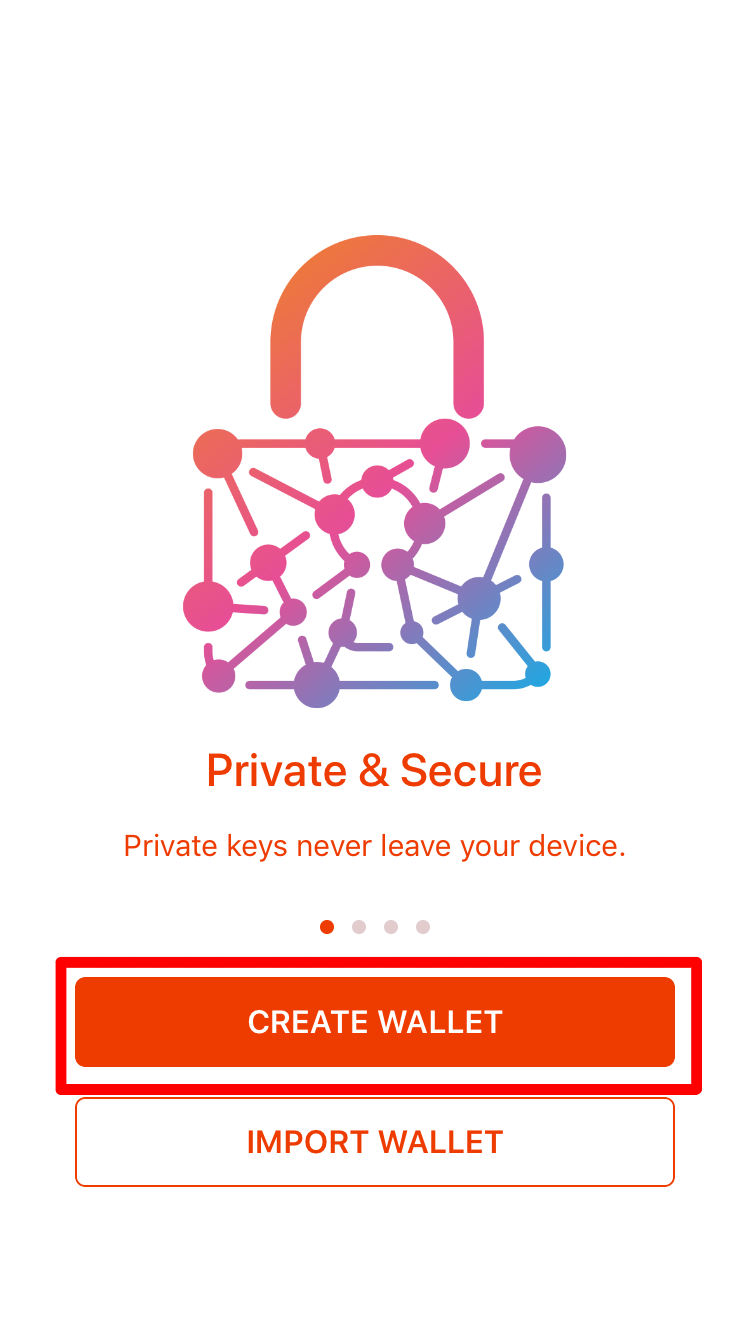
5. After launching Asobi Wallet, tap CREATE WALLET.
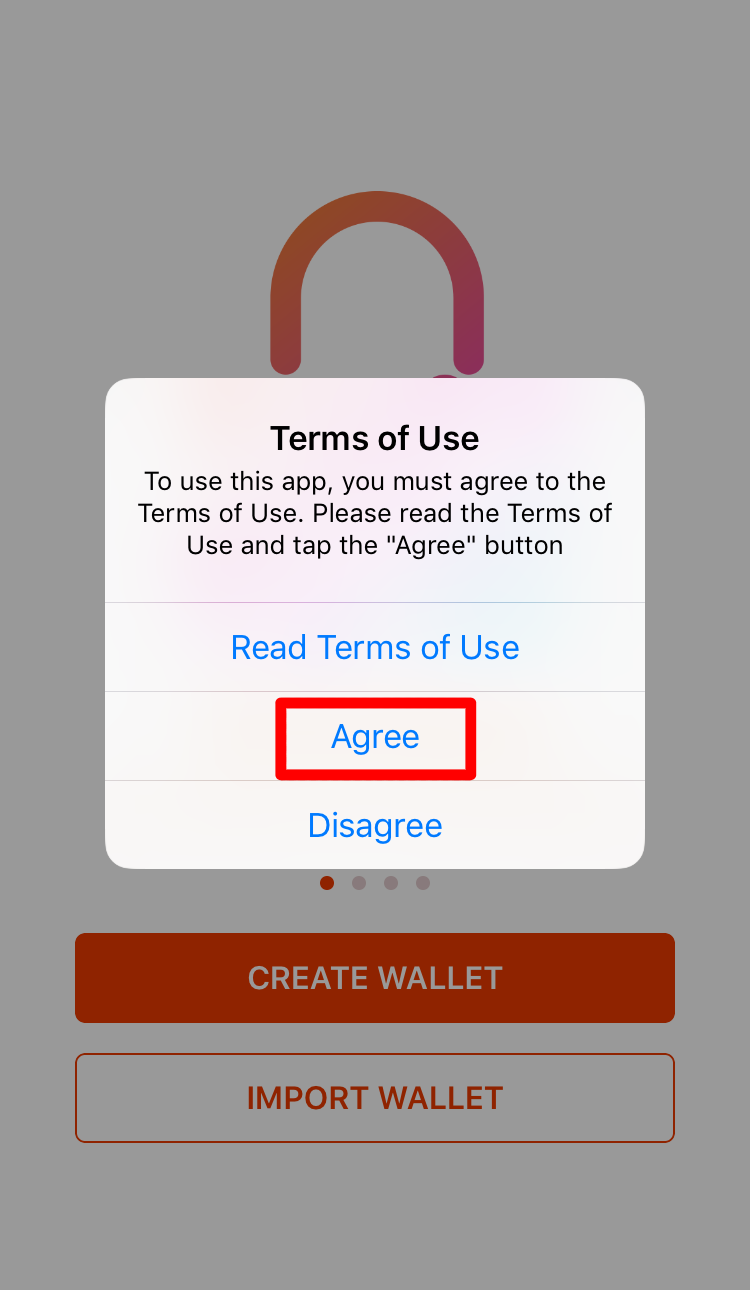
6. Read the Terms of Use and tap Agree.
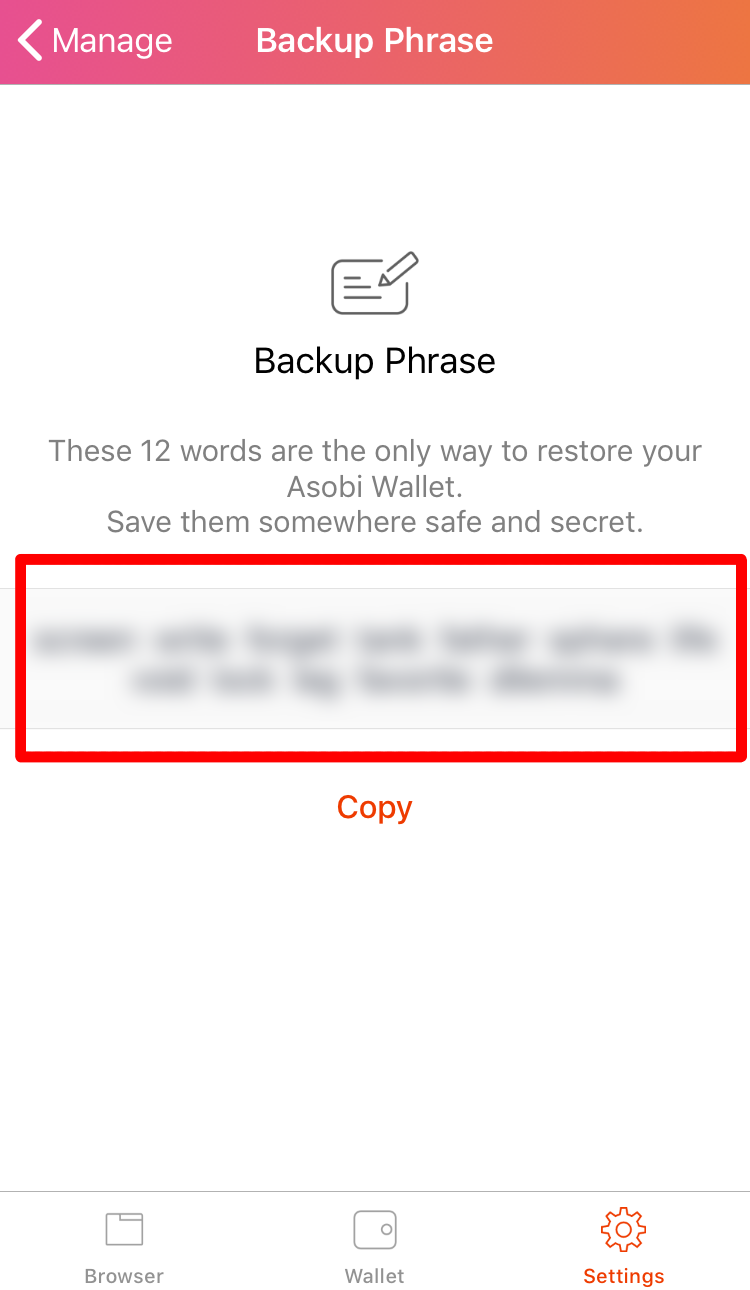
7. Please save your Backup Phrase (12 words) by pressing “Copy” to paste all the words to your notes or by taking a screenshot. Then tap “Next”.
The Back Phrase is necessary when restoring your wallet. Please save it carefully and do not show it to any third parties.
Please do not save your Backup Phrase in the same device as your wallet, but in a separate media (USB memory, SD card etc.) that is not connected to the internet or print it out and keep it in a secure location. Also, we recommend doing regular checks to make sure it stays safe.
Note 1: You will need either your Backup Phrase or Private Key to restore your wallet. We cannot restore your wallet if you don’t have either of them.
Note 2: You can confirm your Backup Phrase or Private Key only by yourself, since we don't keep this information at Asobi Wallet team. Therefore, Asobi Wallet Support cannot respond to any inquiries regarding Backup Phrases or Private Keys.

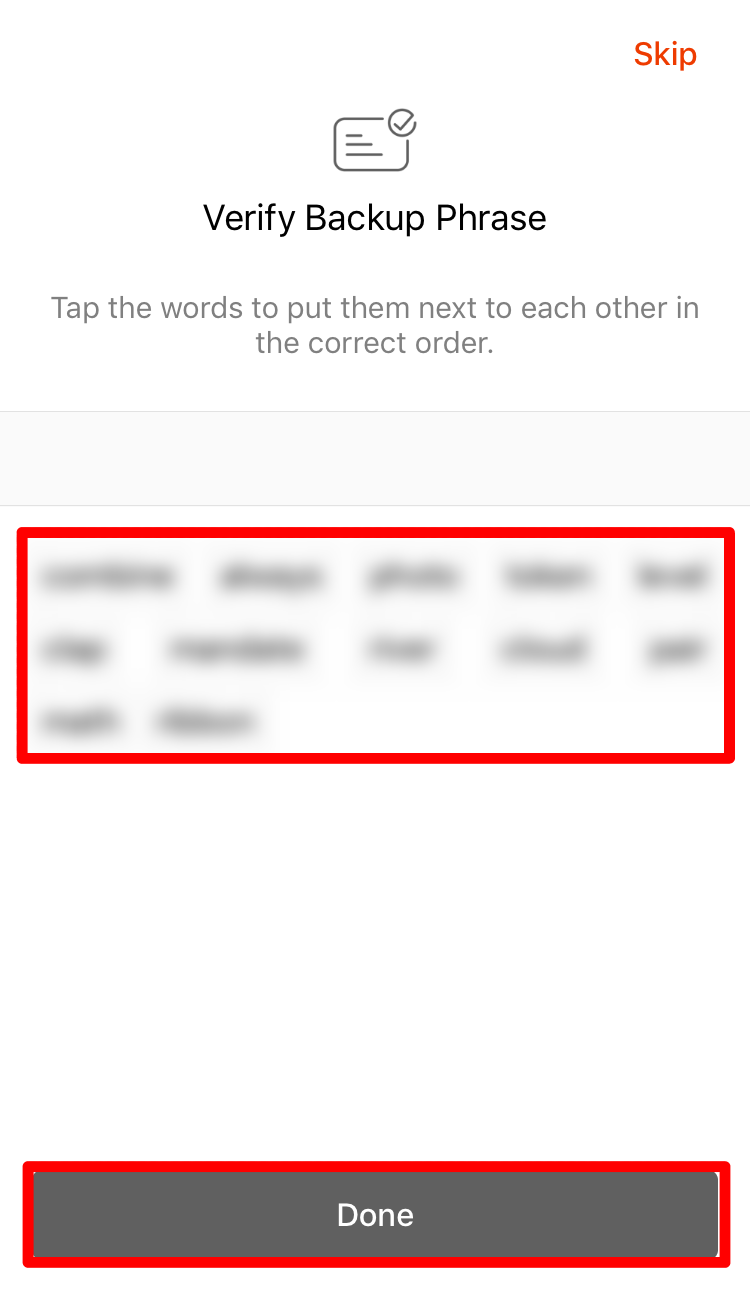
8. Backup Phrase will be shown in different order. Press the words by order that you have seen in the previous screen. After Confirmation Complete! appears, tap Done.
9. Press Done to proceed.
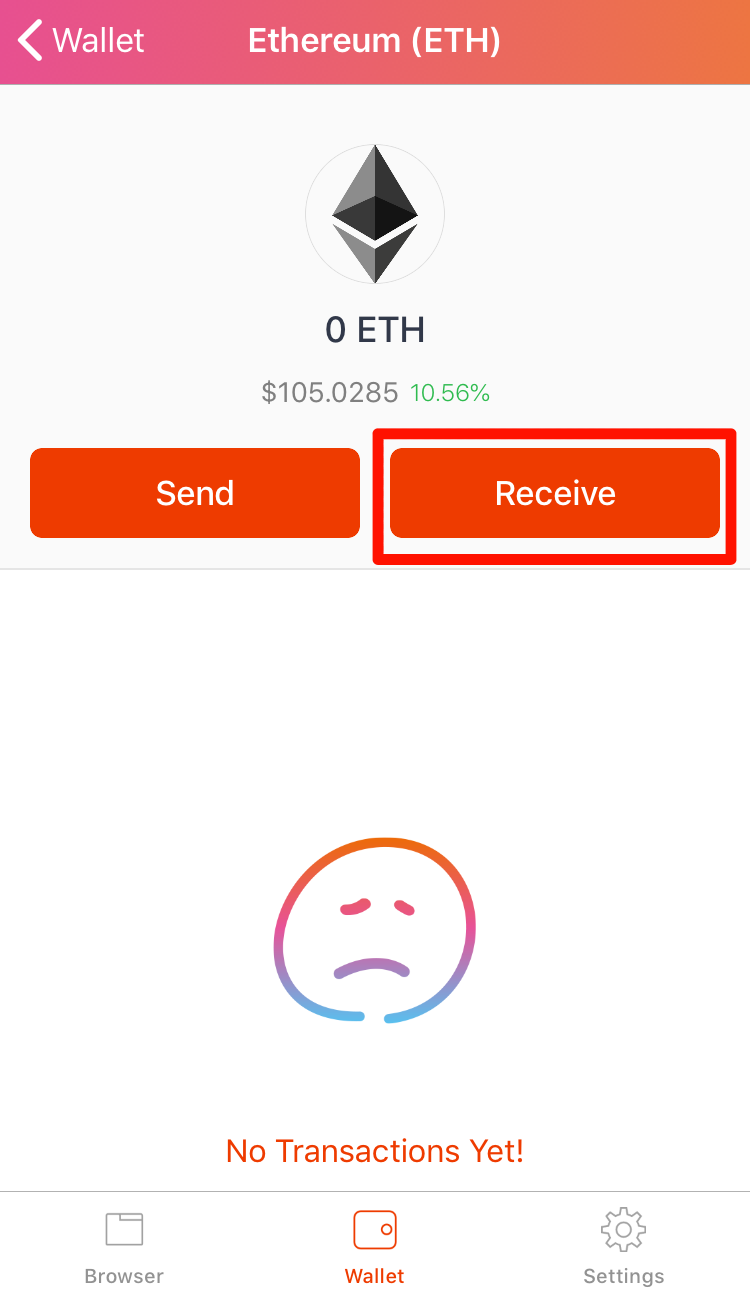
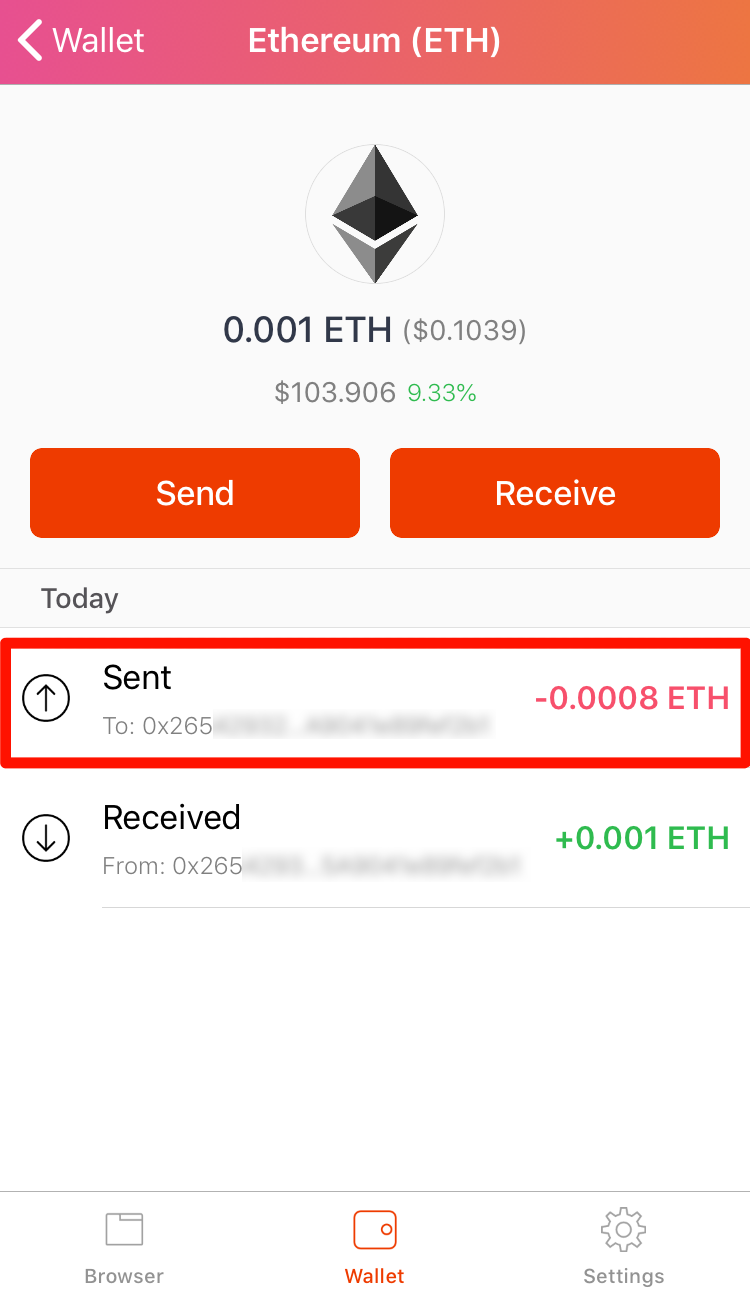
Receive Crypocurrency
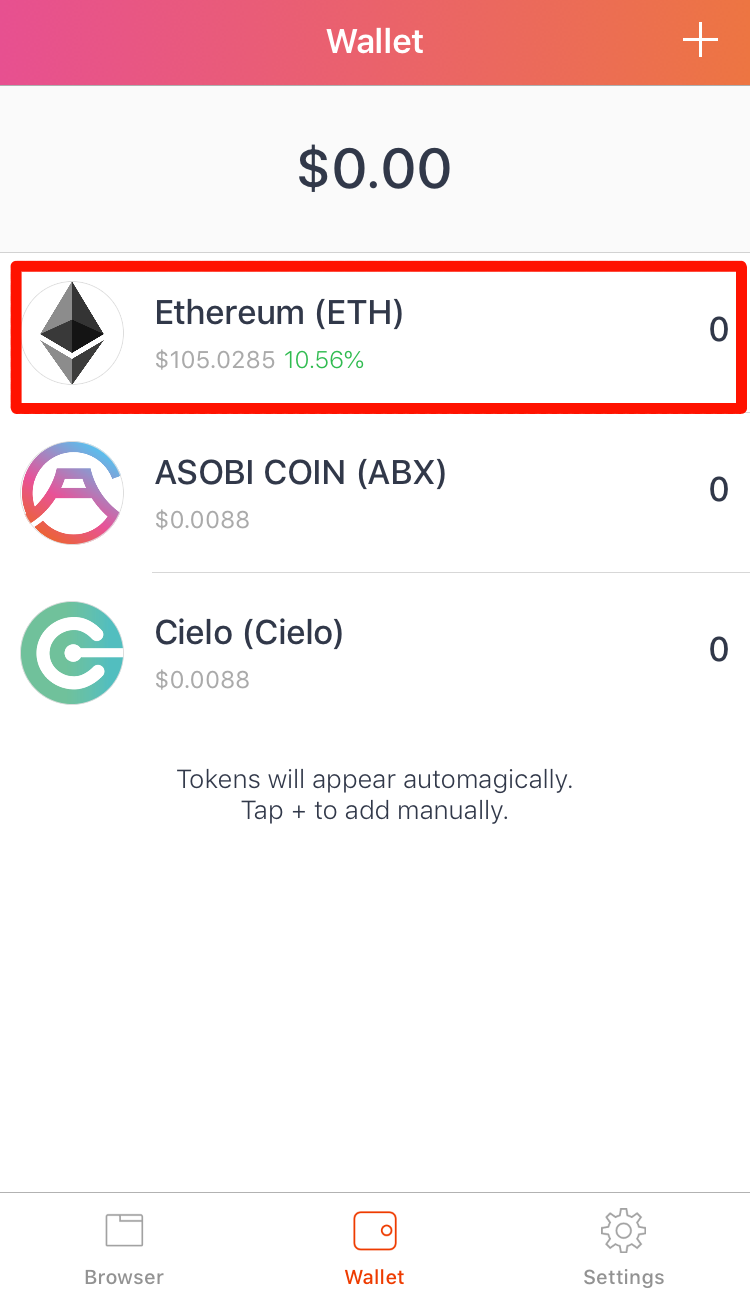
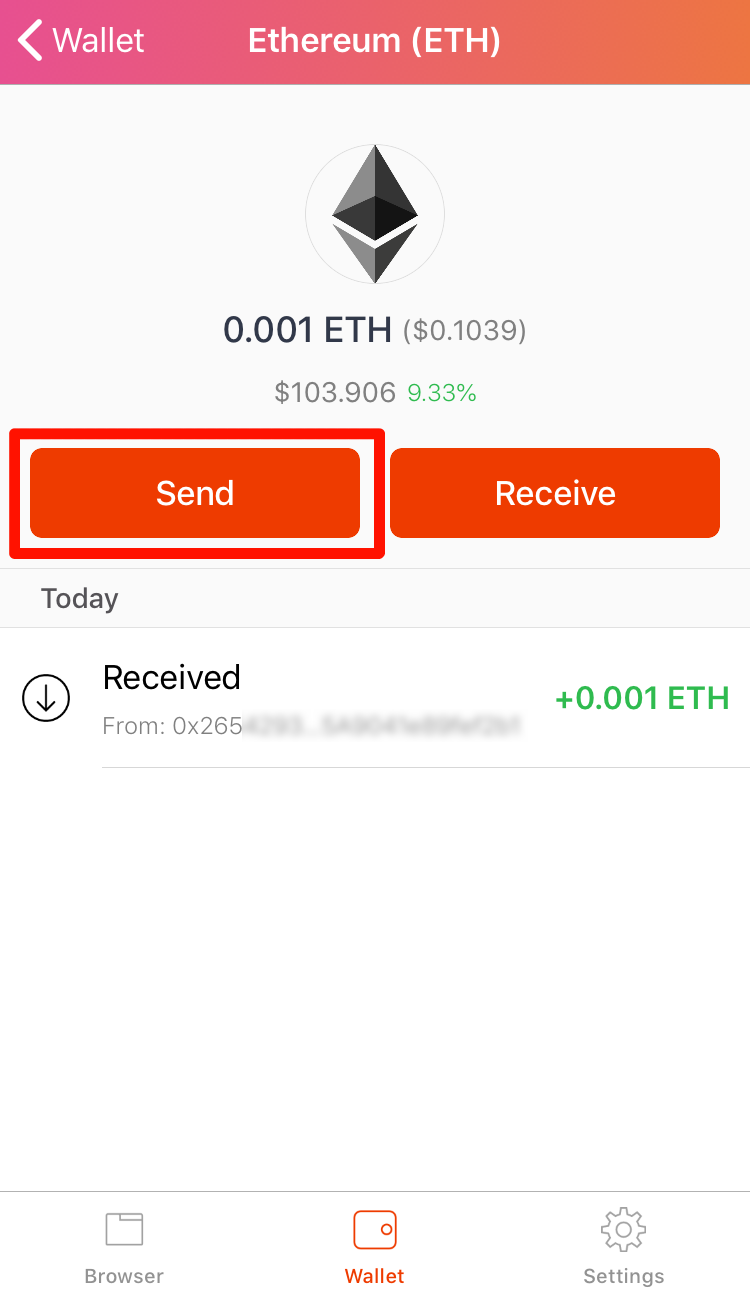
1. Select the currency you will like to send from the Wallet screen.

2. Tap Receive
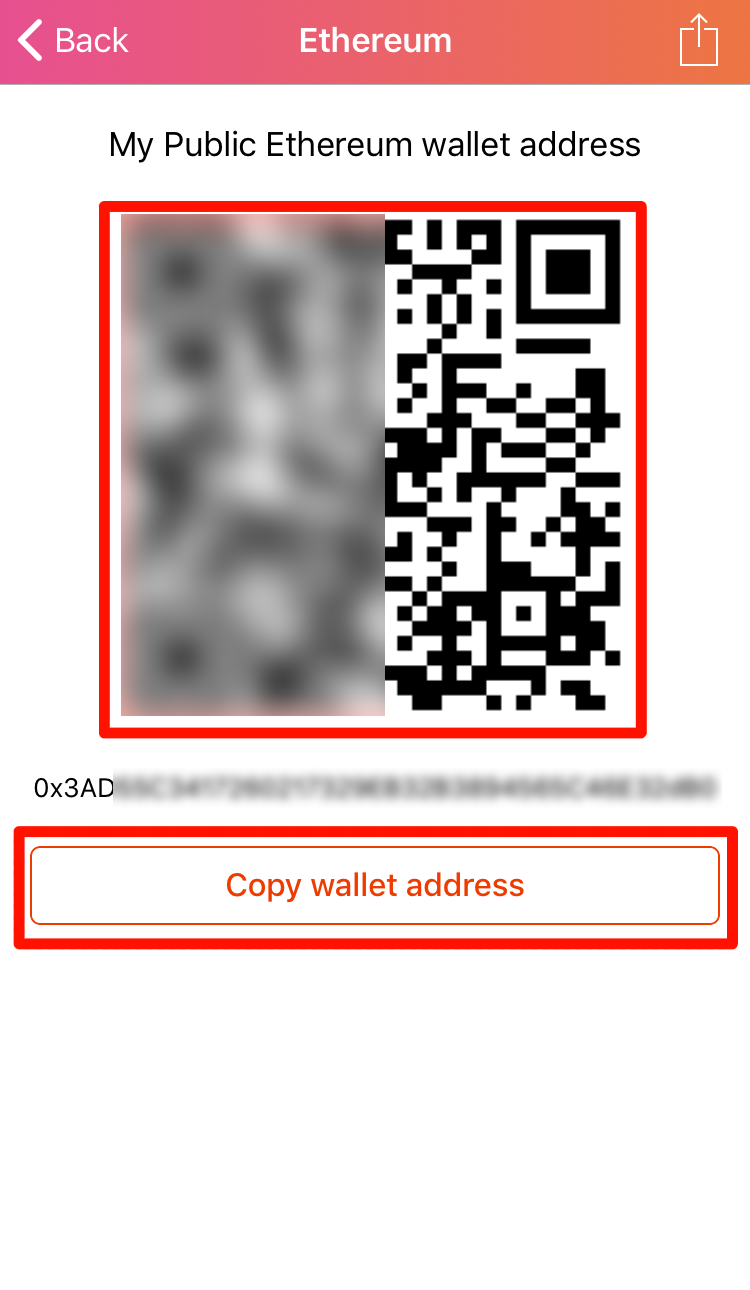
3. Read the QR code or press Copy wallet address to paste to the sending wallet. Send the currency after from the sending wallet.
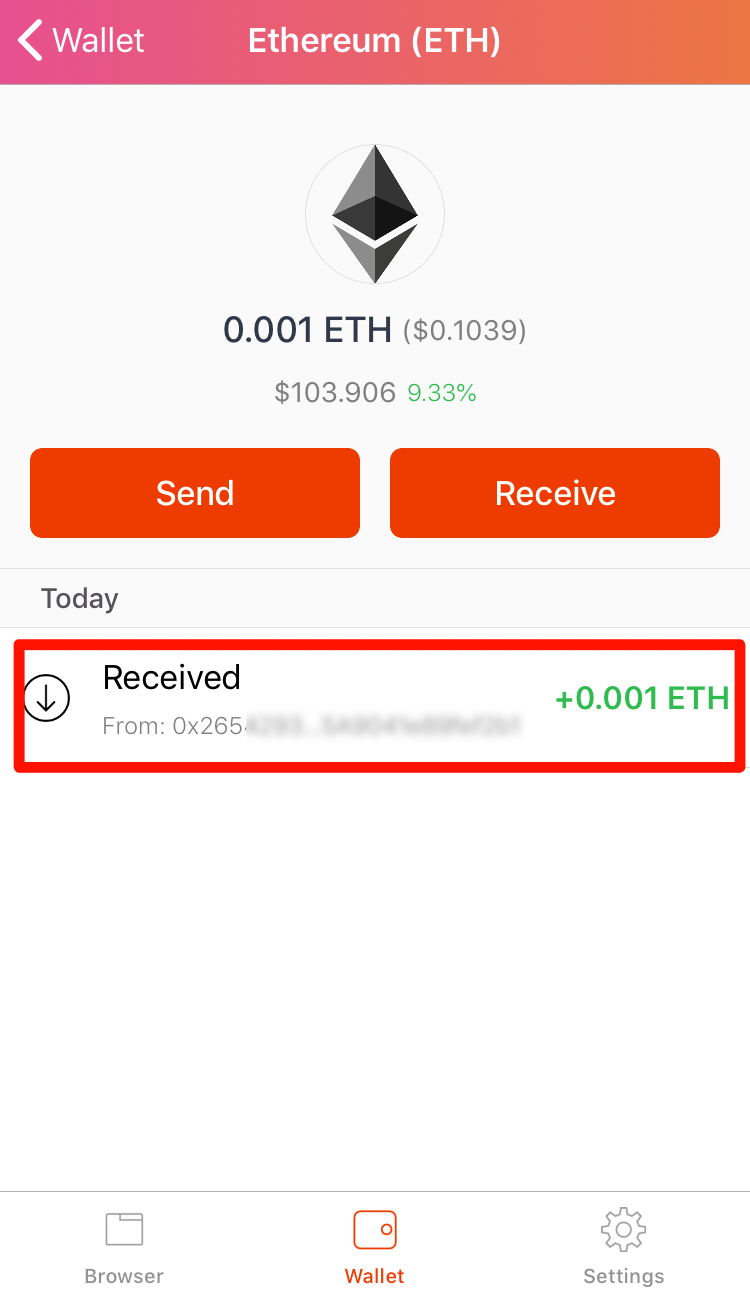
4. Go back to the previous screen to confirm your received cryptocurrency. “Received” will be shown when the transaction successes.
Sending Cryptocurrency
1. Select the currency you will like to send from the Wallet screen.
2. Tap on Send.
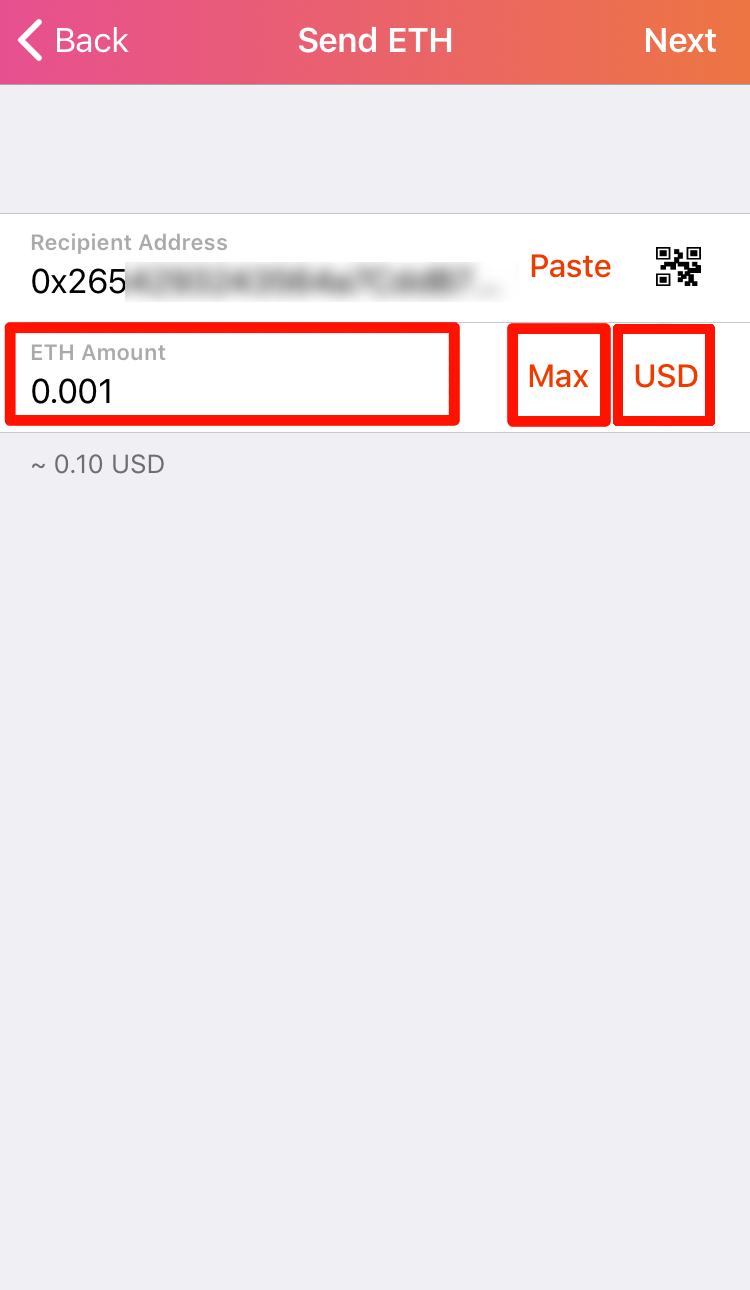
3. Enter sending address. If you have already copied the sending address, press Paste. You can tap QR code icon to read with camera.
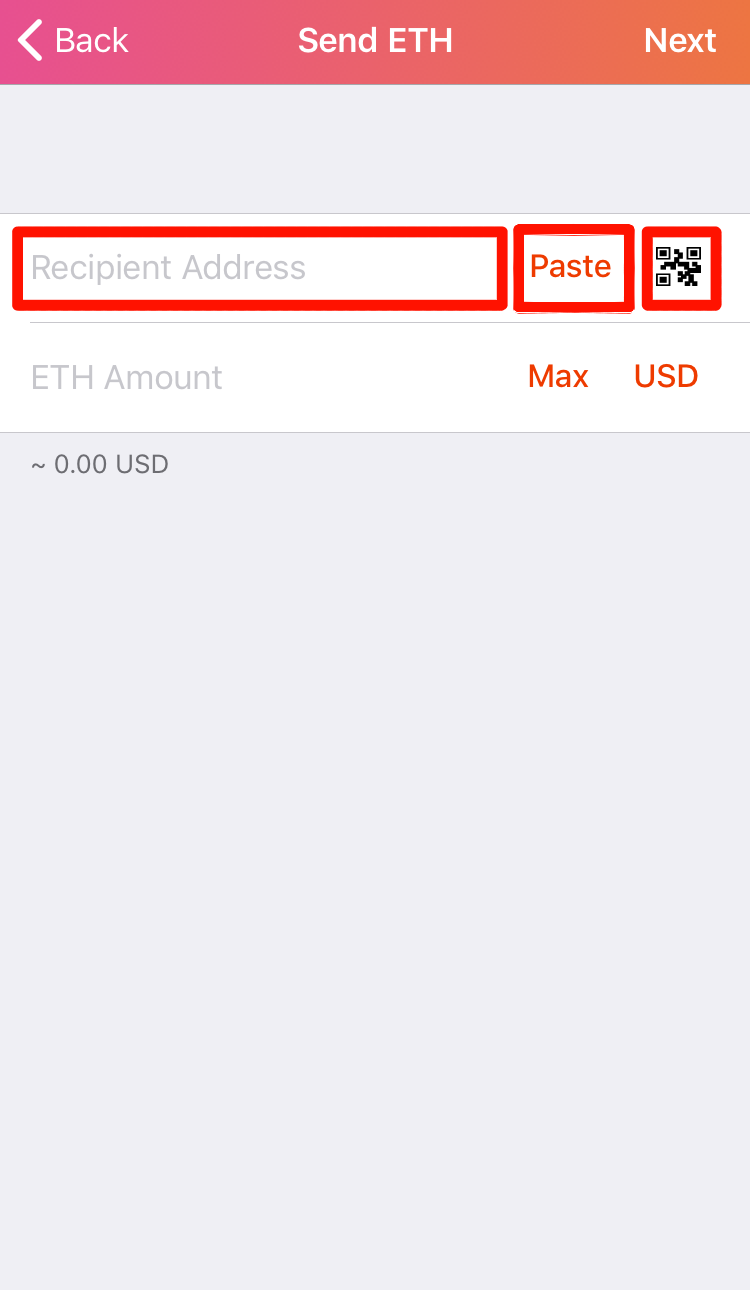
4. Enter the amount of currency in numbers. You can press the Max button to enter your maximum amount. USD button will show in USD base.
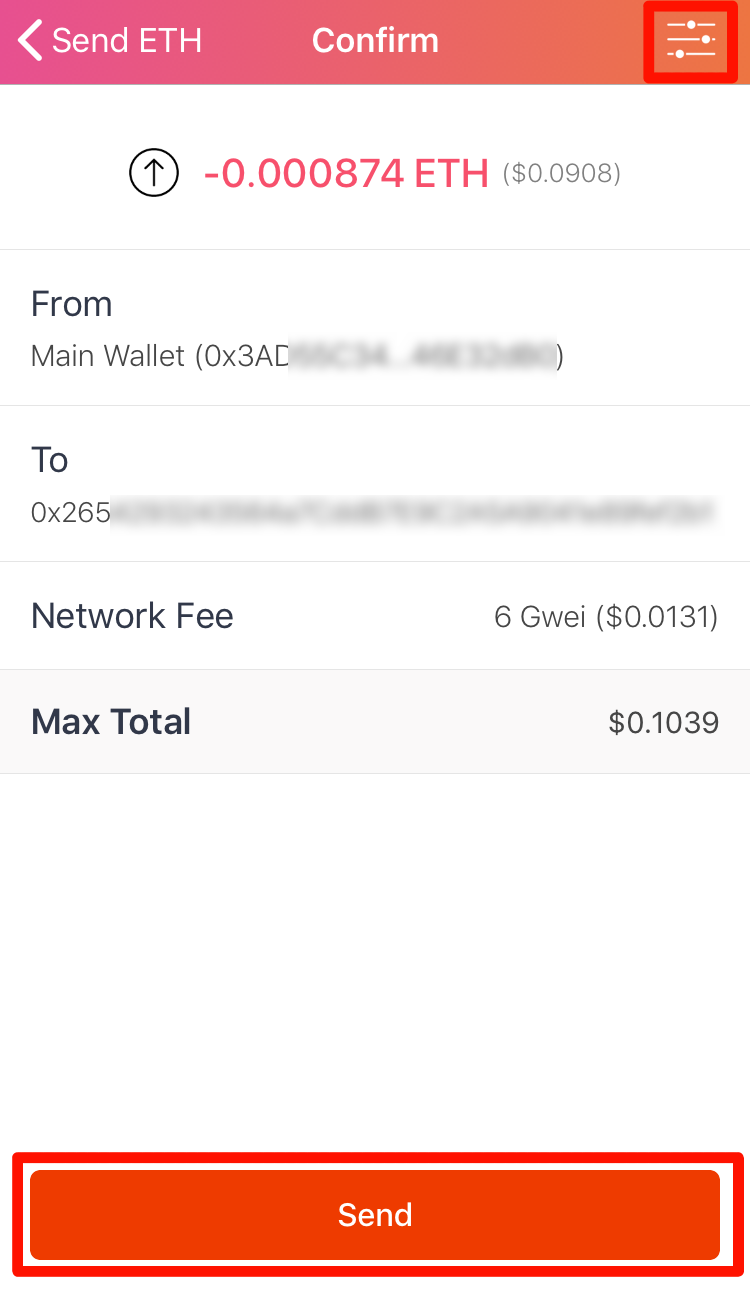
5. Confirm the amount, sending address and network fee and press “Send”.
Please be sure to confirm that the recipient address is correct before pressing the "Send" button.
Even if one letter is wrong, the funds will be sent to another wallet.
Also, it is not possible to retrieve tokens that are sent by mistake.
If you wish to adjust the network fee, press the icon on the top right corner to access the adjustment page.
Note: ASOBI COIN is an ERC20 token using the Ethereum blockchain, which is why ETH is needed for the network fee when conducting a transaction. Please note that the transaction cannot be made If your ETH balance is insufficient in your wallet.
6. After your transaction becomes Sent from pending, your transaction was successfully completed.
ABX transaction usually takes only a few minutes to comoplete, but depending on the transaction congestion, it may take up to several hours.
If the same transaction is sent many times while the transaction is still in process, it may cause problems such as duplicate transactions and transaction failures.
Please wait patiently and do not keep sending the transaction multiple times.
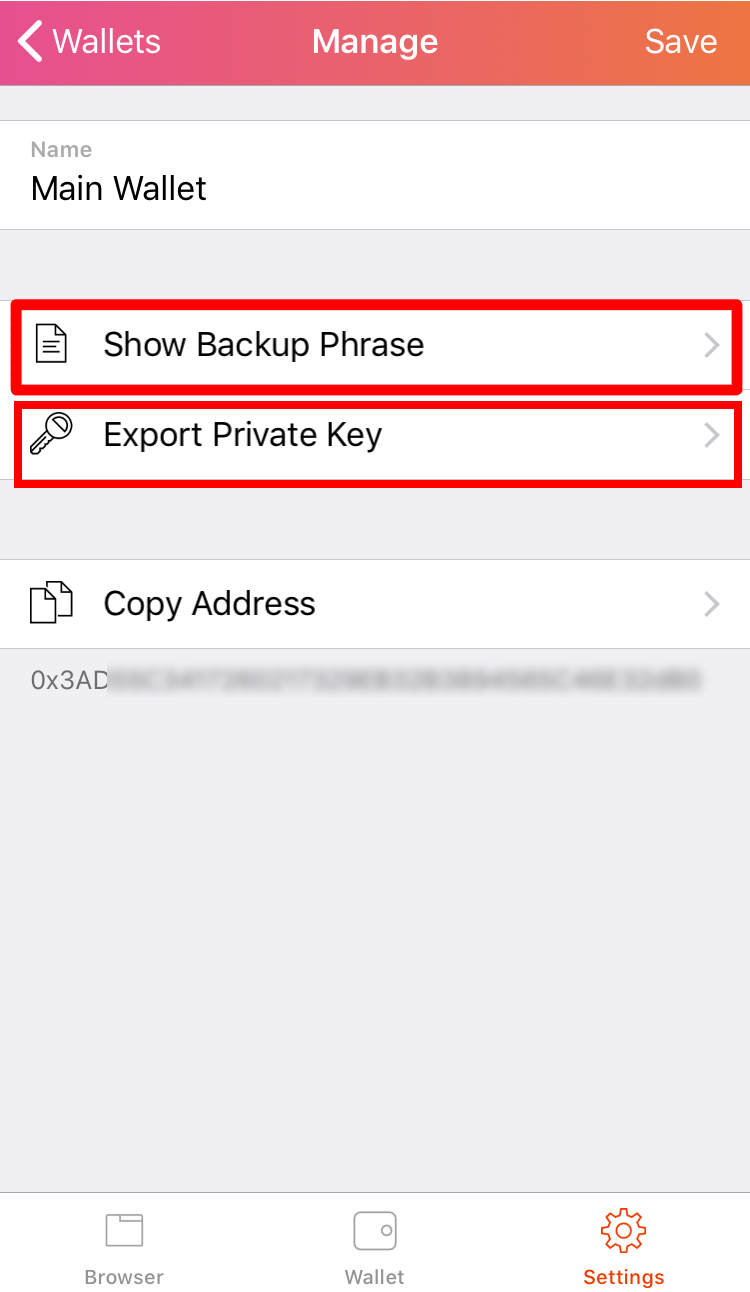
How to Confirm your Backup Phrase and Private Key
1. Press Setting on the right bottom corner.
2. Tap on Wallet.
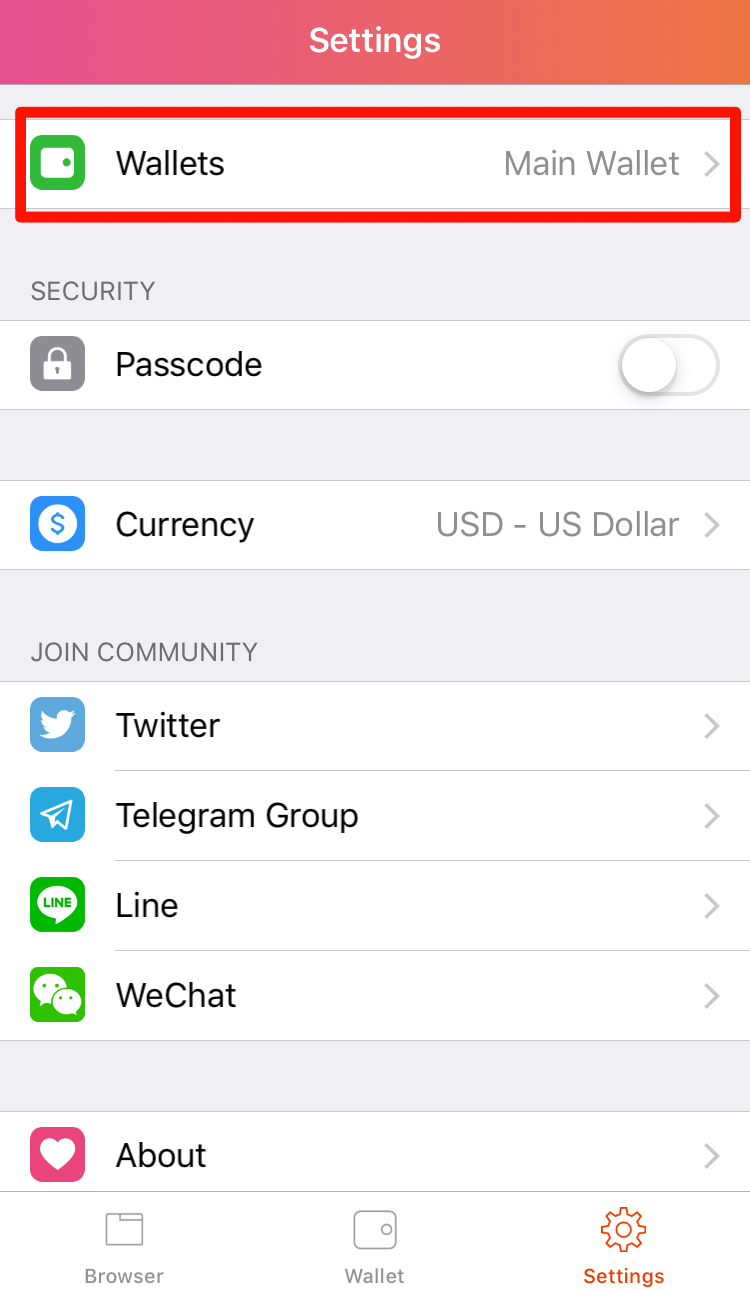
3. Click on “i” icon.
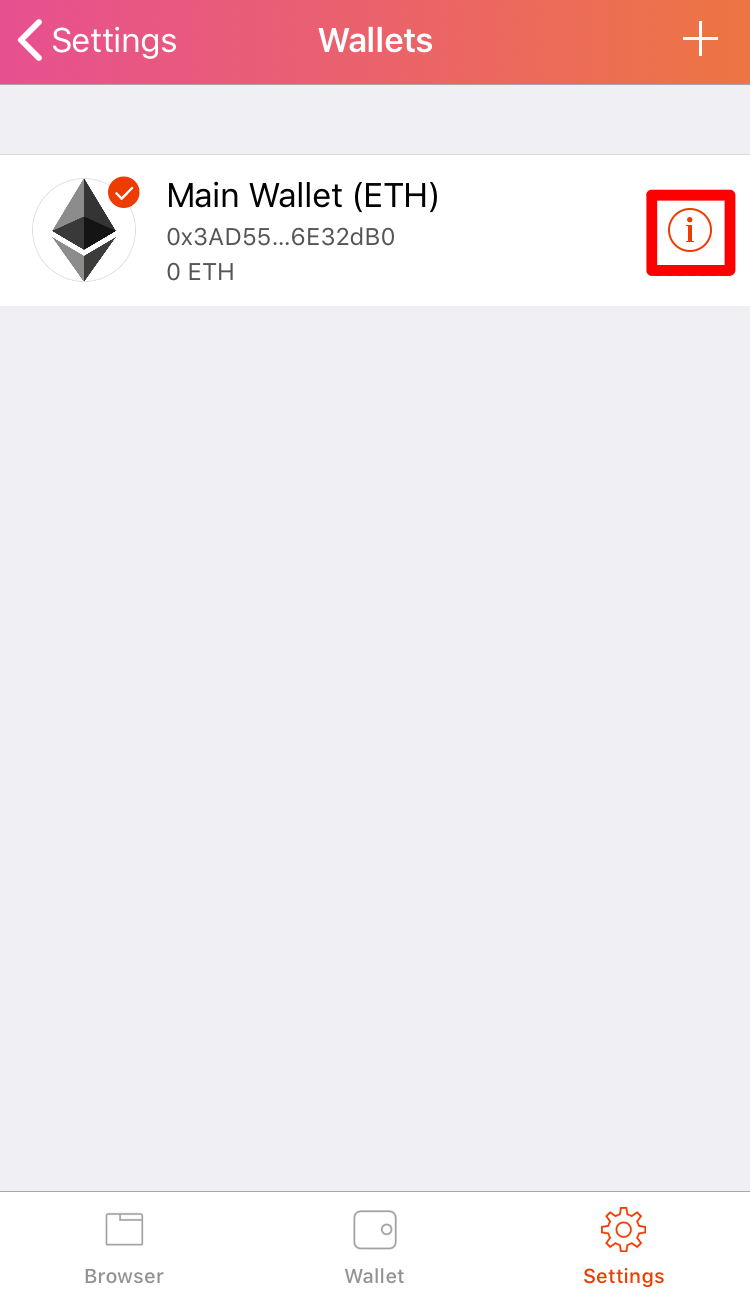
4. Please tap ”Show Backup Phrase” to check your Backup Phrase, or “Export Private Key” to check your Private Key.
5. Your Backup Phrase will be displayed when you tap ”Show Backup Phrase”. Please save it by pressing ”Copy” to paste it to your notes or by taking a screenshot.
Note: Do not show your Backup Phrase to any third parties as they will be able to restore your account.
Please make sure to keep it private and safe.
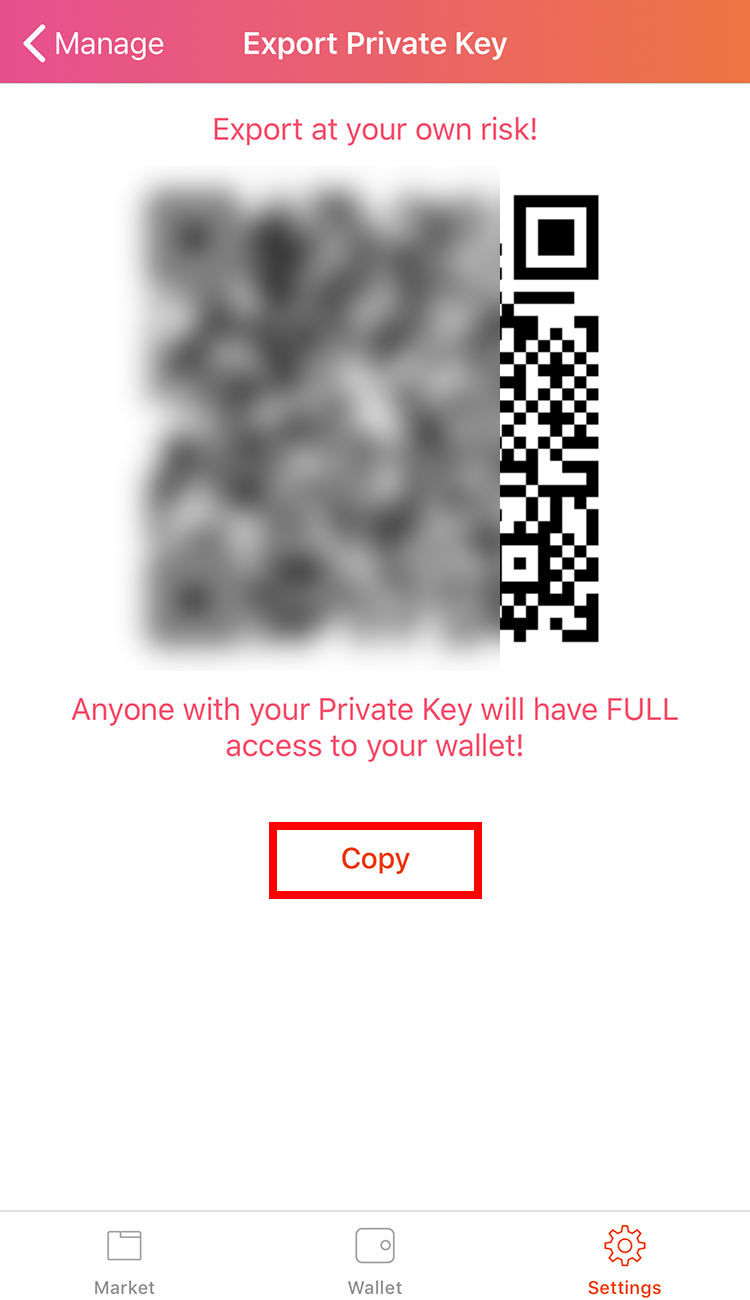
6. You can access the Private Key export screen when you tap ” Export Private Key”. Please save the key by pressing ”Copy” to paste it to your notes or by taking a screenshot of the QR code.
Note: Do not show your Private Key to any third parties as they will be able to restore your account.
Please make sure to keep it private and safe.
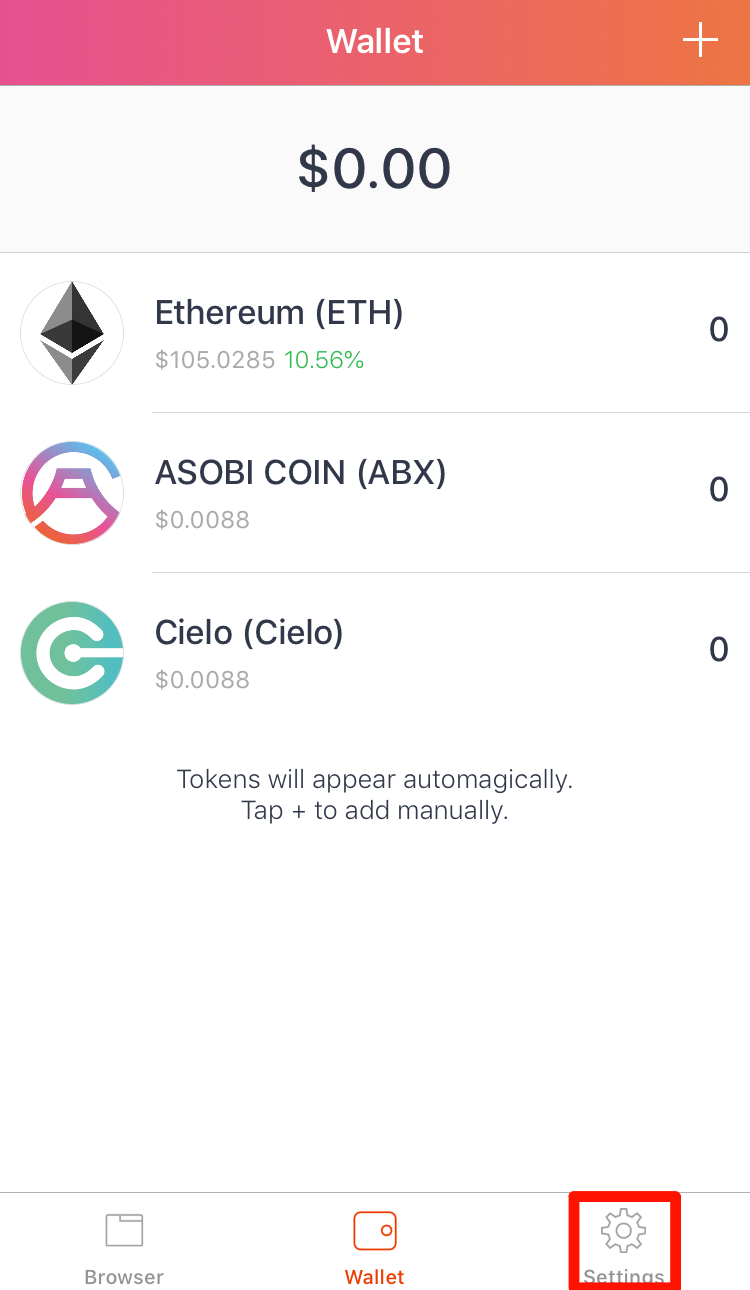
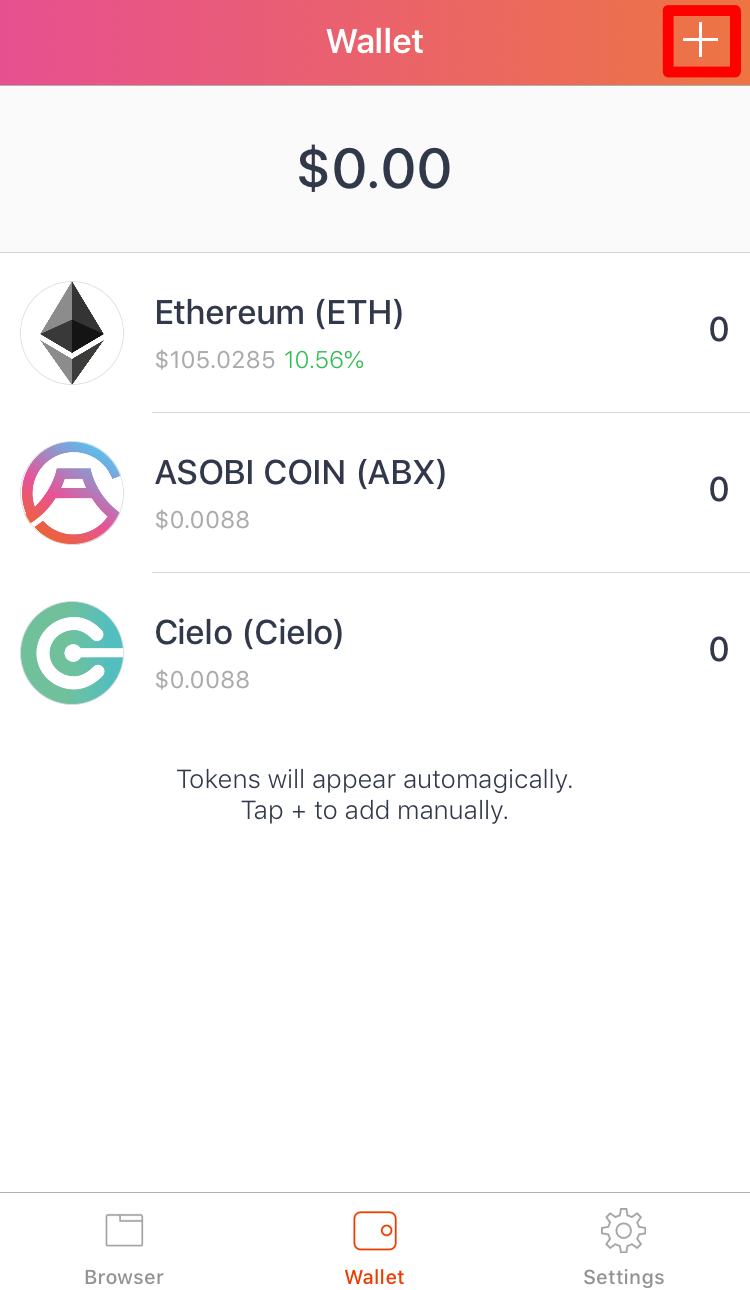
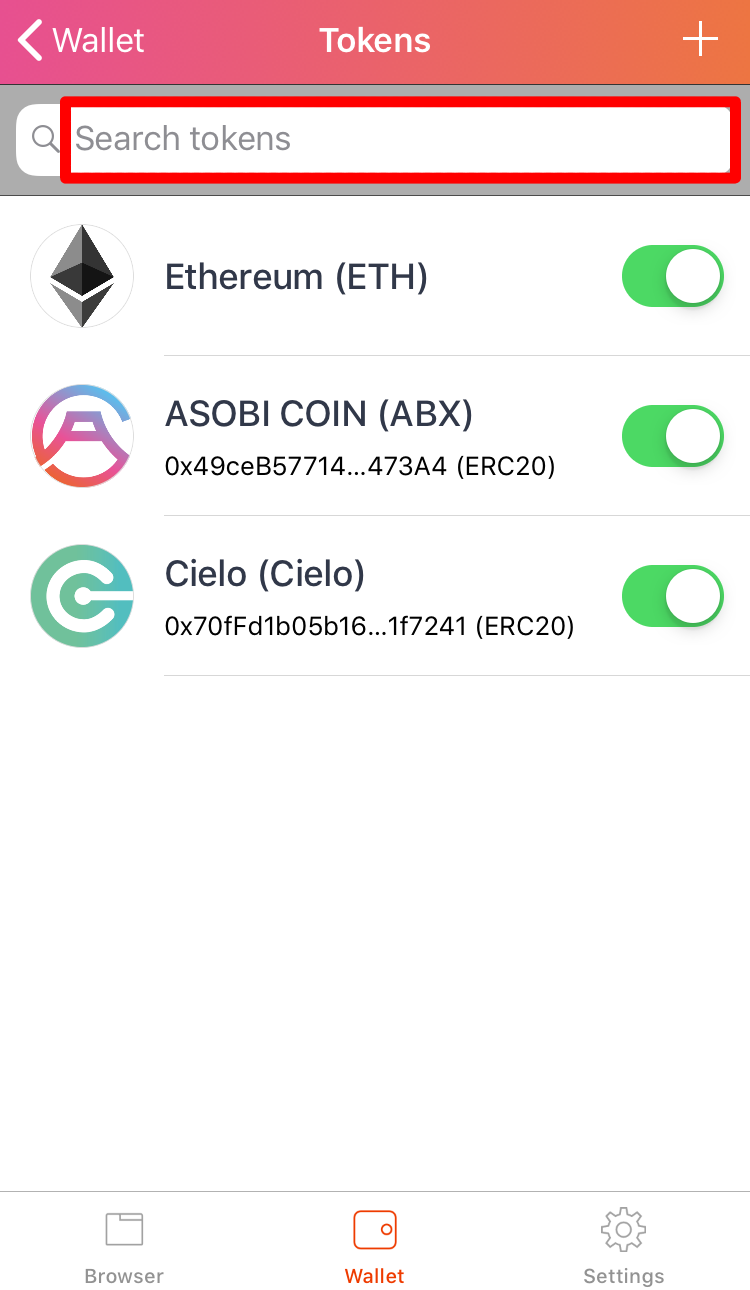
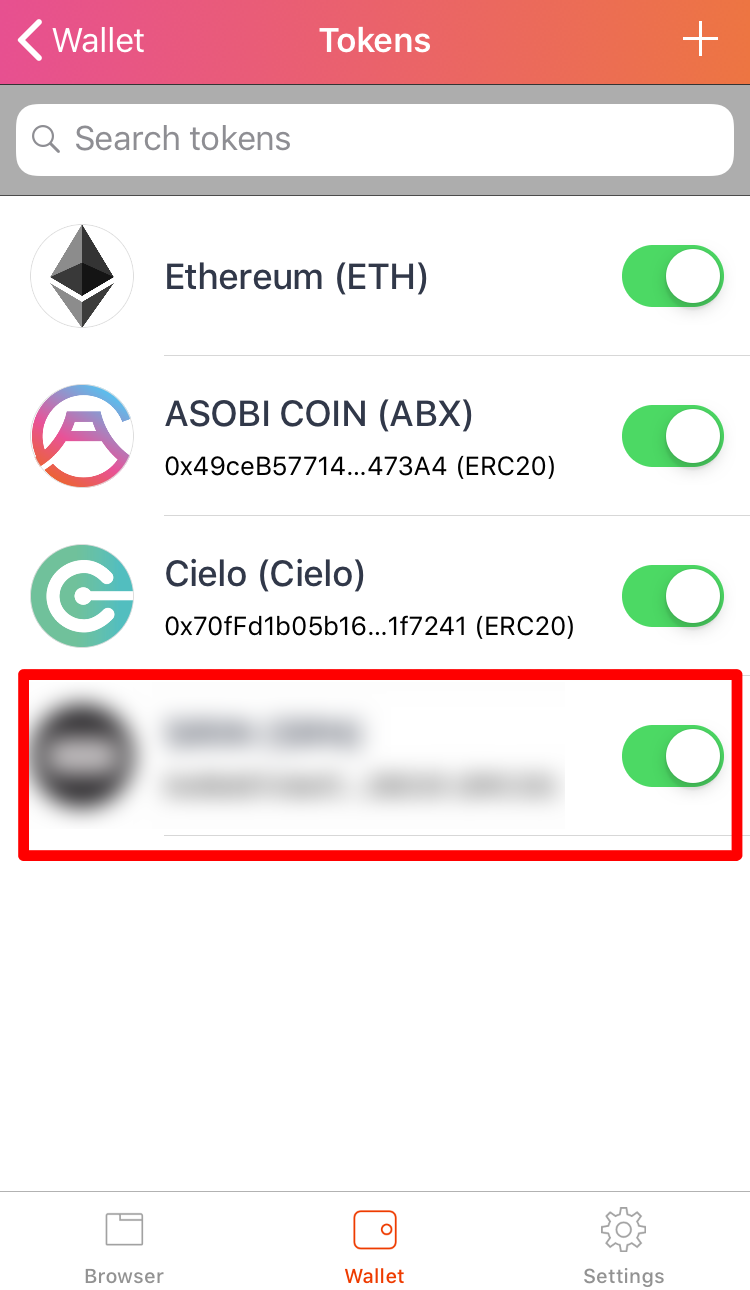
Add Custom Token
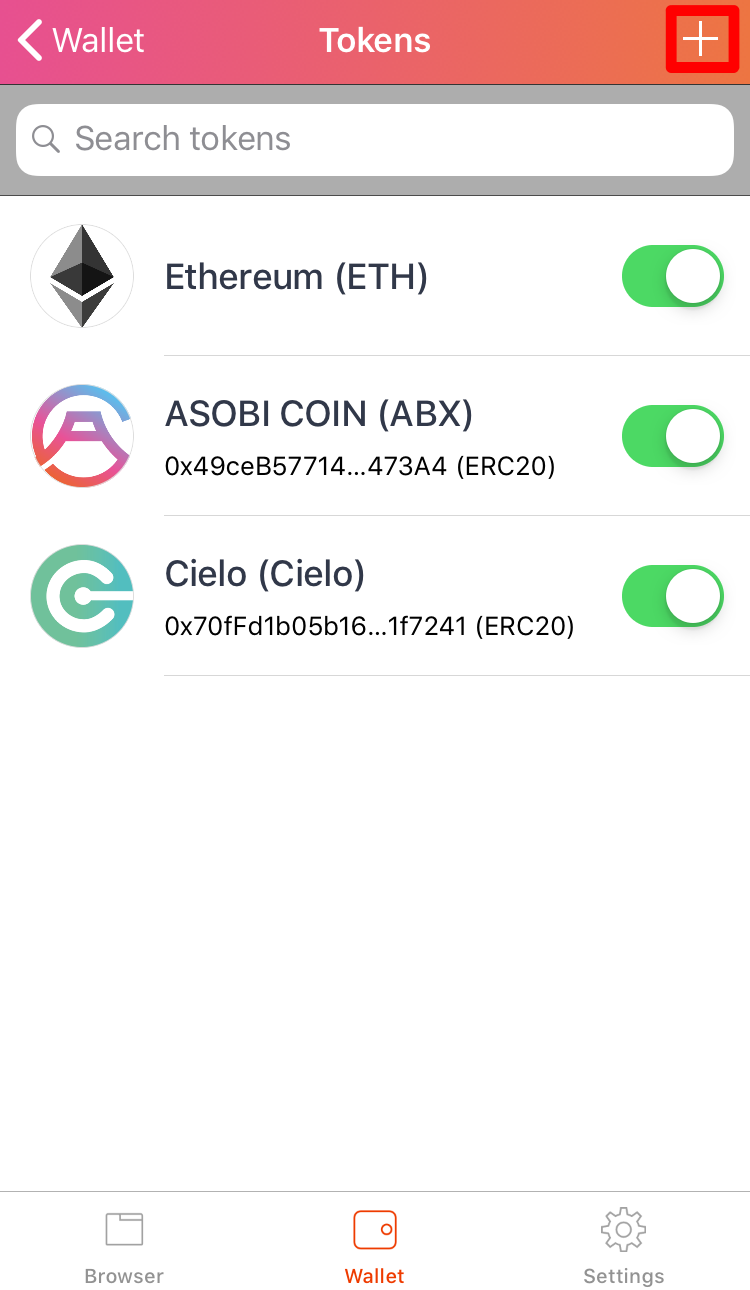
1.Tap on “+” icon on the top right corner on the Wallet screen.
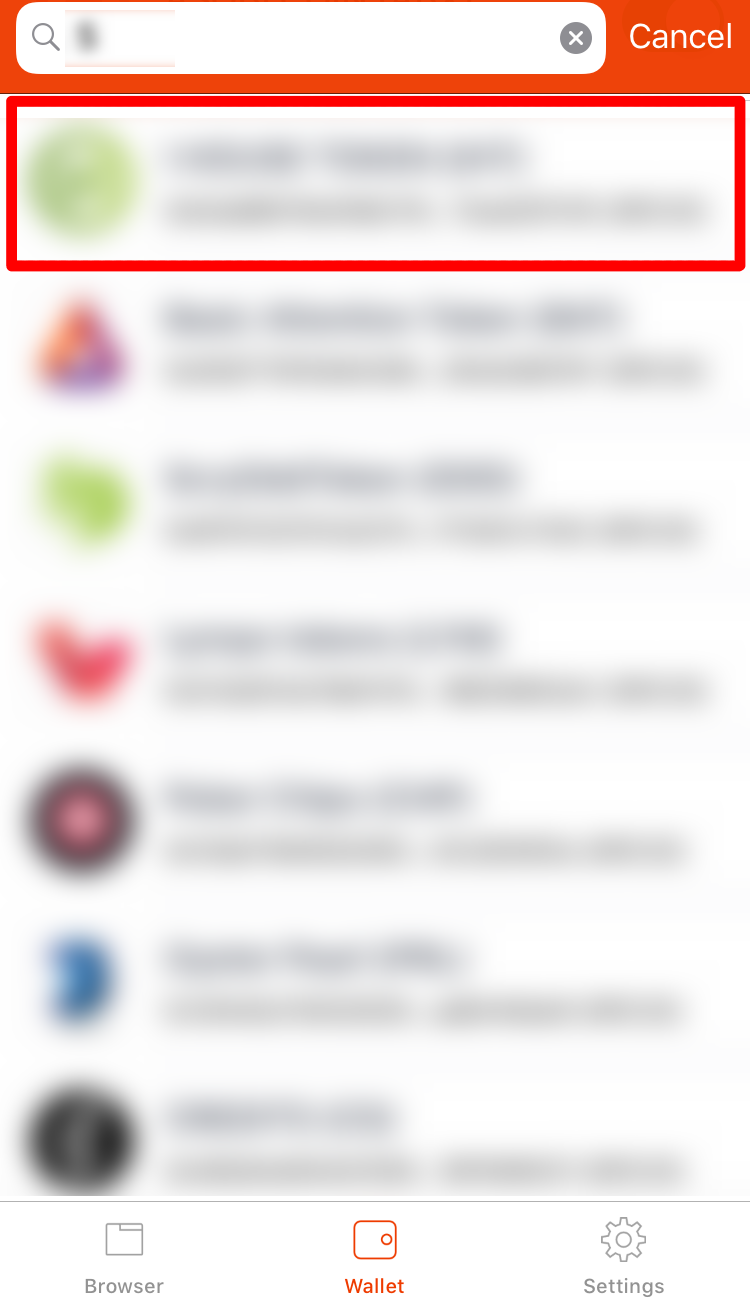
2. Enter the name of tokens you like to search.
3. Tap on the token you wish to add.
4. If you cannot find the token at the search engine, press “+” button to enter the smart contract address.
5. Enter the token’s smart contract address or press “Paste” if you have already copied. You can also read by QR code with your camera. Press Done after you confirm the name and symbol.
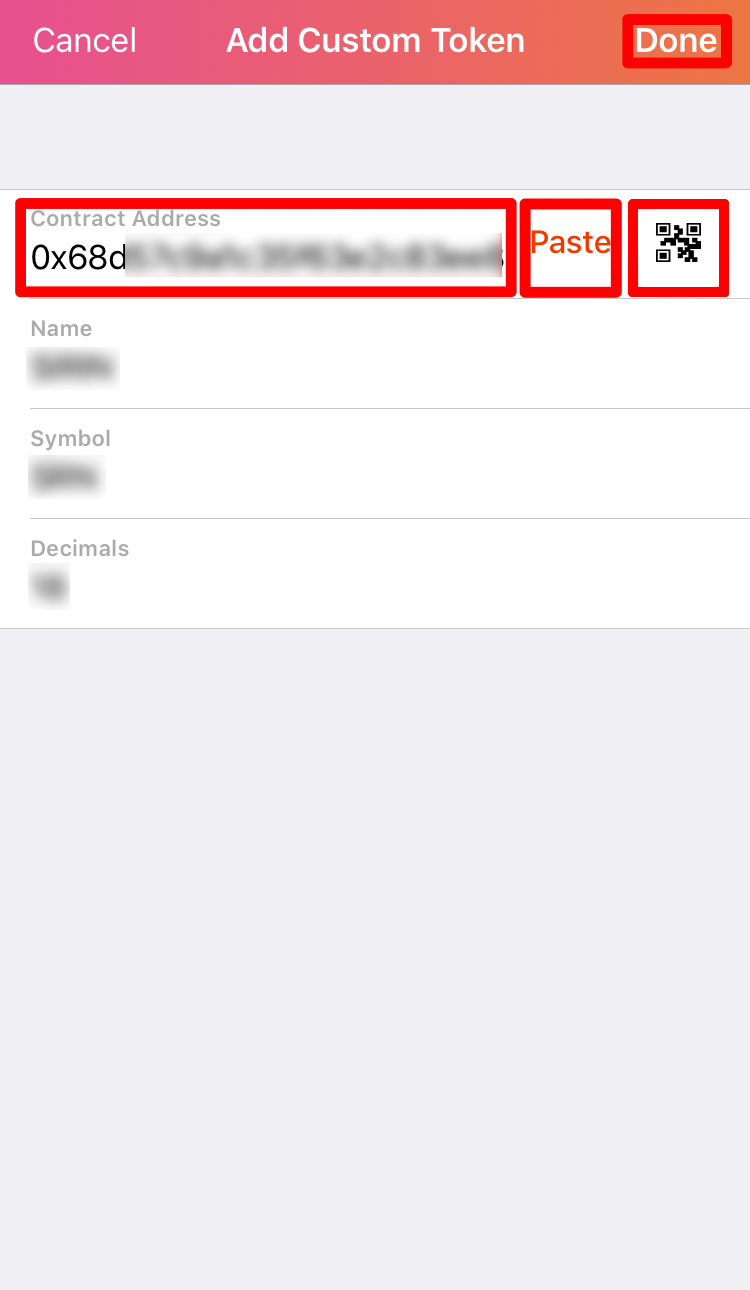
6. Your token should appear in the Wallet page.
Restore Asobi Wallet / Import External Wallets
1. Prepare your Asobi Wallet Backup Phrase or Private Key.
You need either your Backup Phrase or Private Key to restore your Asobi Wallet.
We cannot restore your wallet if you don’t have either of them.
To check your Asobi Wallet Backup Phrase and Private Key, please look here.
Please note that this explains the restore and import methods for Asobi Wallet. However, if you wish to import your MyEtherWallet or other external wallet into Asobi Wallet, the method will fundamentally be the same.
Note: It is possible to restore and import your wallet even when changing the OS (iOS to Android/ Android to iOS) of your device.
2. Please install Asobi Wallet to the device you wish to restore it.
Please look here(steps 1-4) for guidance about installing Asobi Wallet.
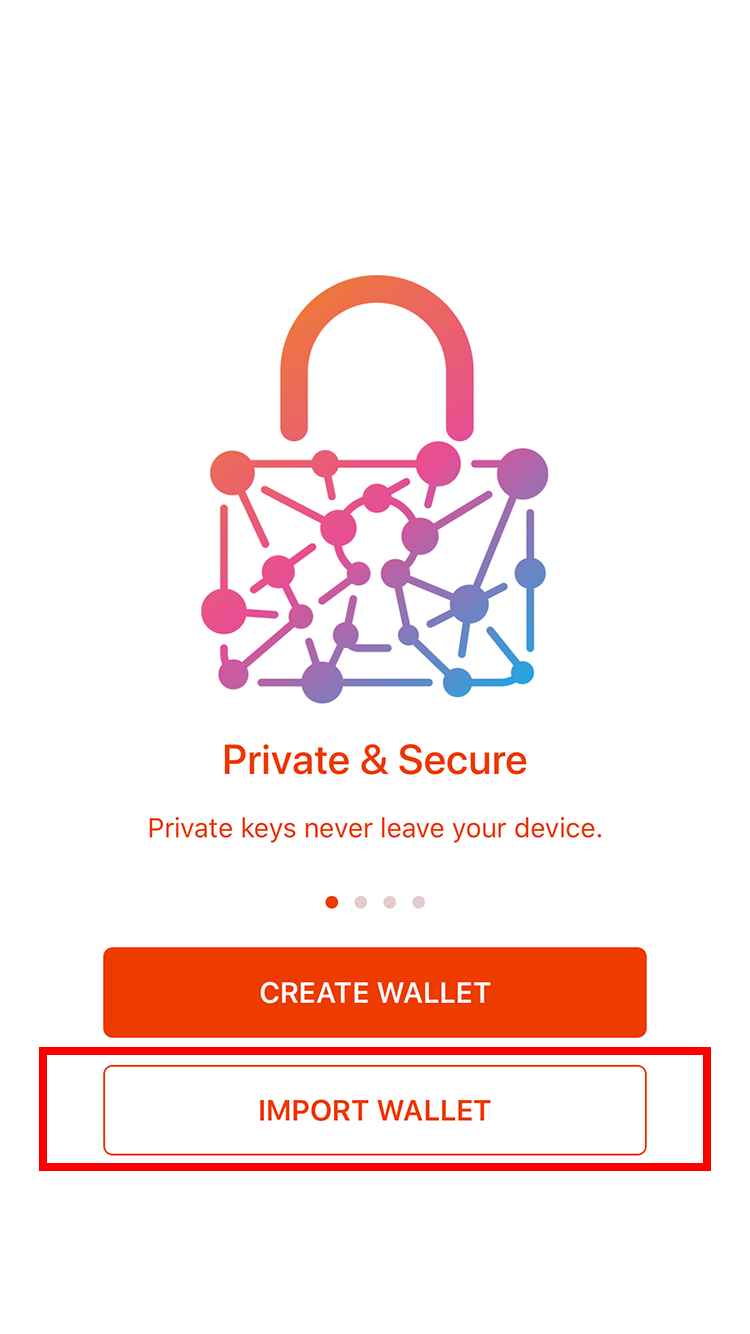
3. Start Asobi Wallet and tap “IMPORT WALLET”.
4. Read the Terms of Use and tap “Agree”

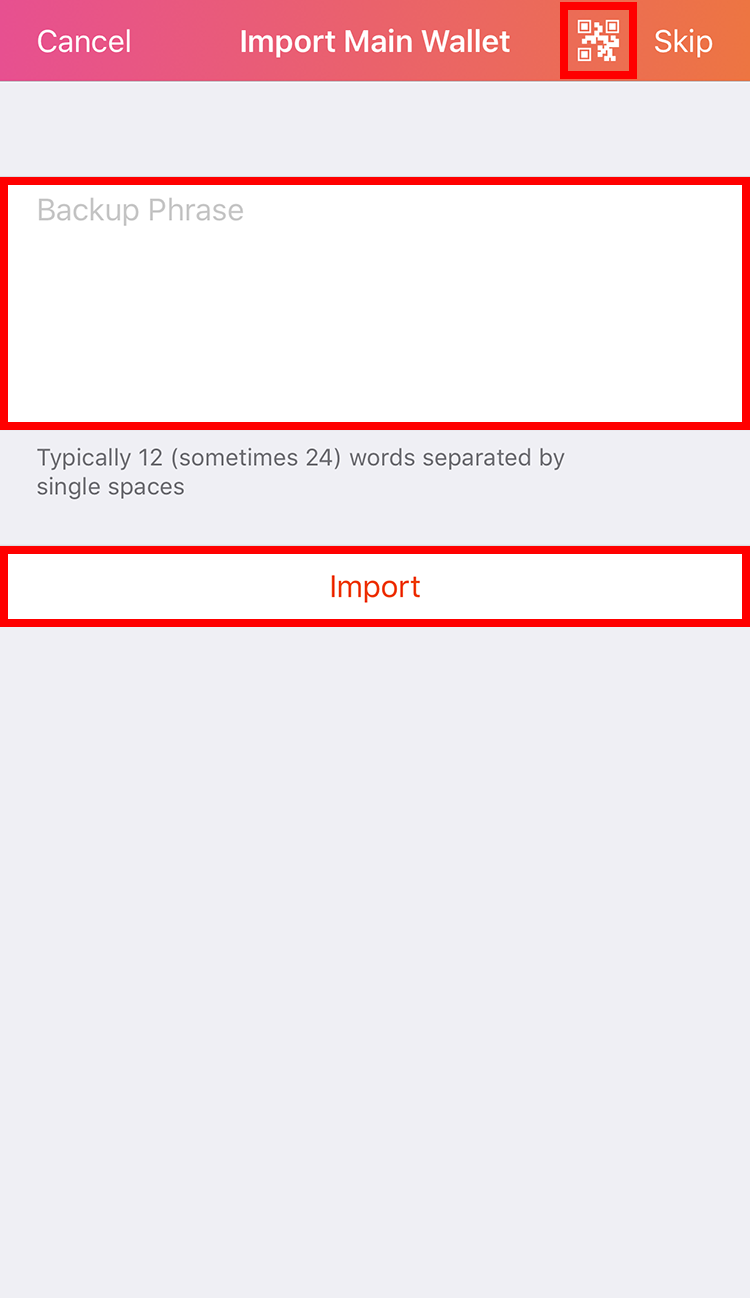
5. Please enter your wallet information into the displayed wallet information screen with either of the following methods.
When importing an external wallet into Asobi Wallet, there may be methods that cannot be used depending on the specifications of the original wallet. (Ex. MyEtherWallet does not use Backup Phrases, which is why you can import only with a Private Key.)
When using Backup Phrase
Separate the words of your Backup Phrase with a space and enter them into the box. Then tap “Import”.
You can also enter them by reading your Backup Phrase QR code (tap the QR code mark on the top right).
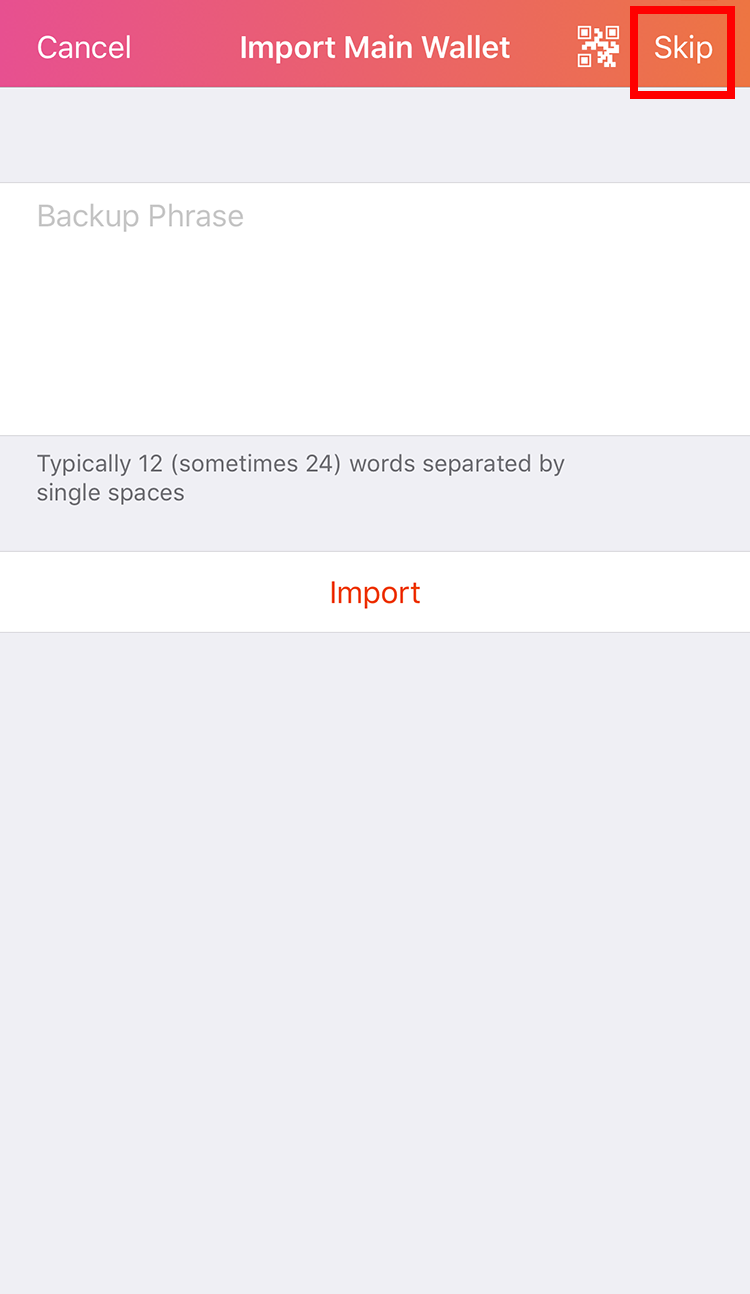
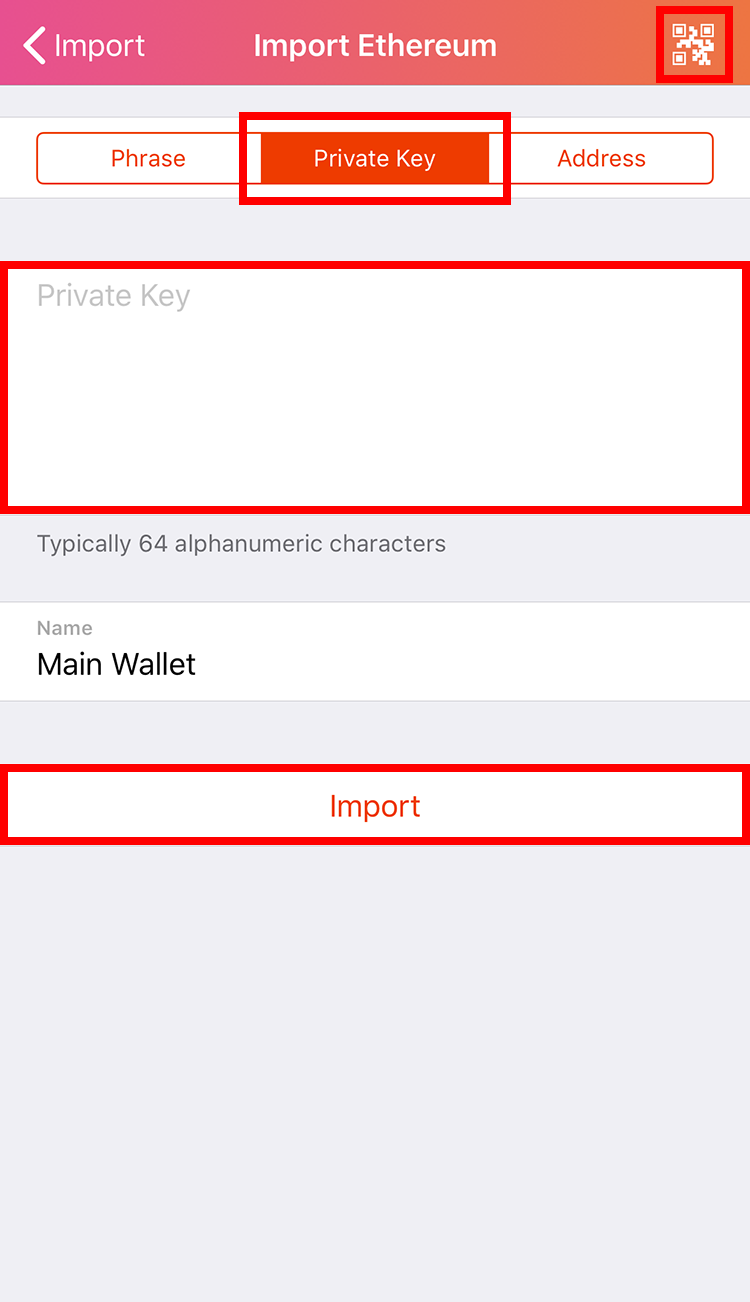
When using Private Key
Tap ”Skip” on the top right, proceed to “EthereumWallet”>”Private Key” and after pasting your original wallet’s Private Key to the box, press “Import”.
You can also enter it by reading your Private Key QR code (tap the QR code mark on the top right).
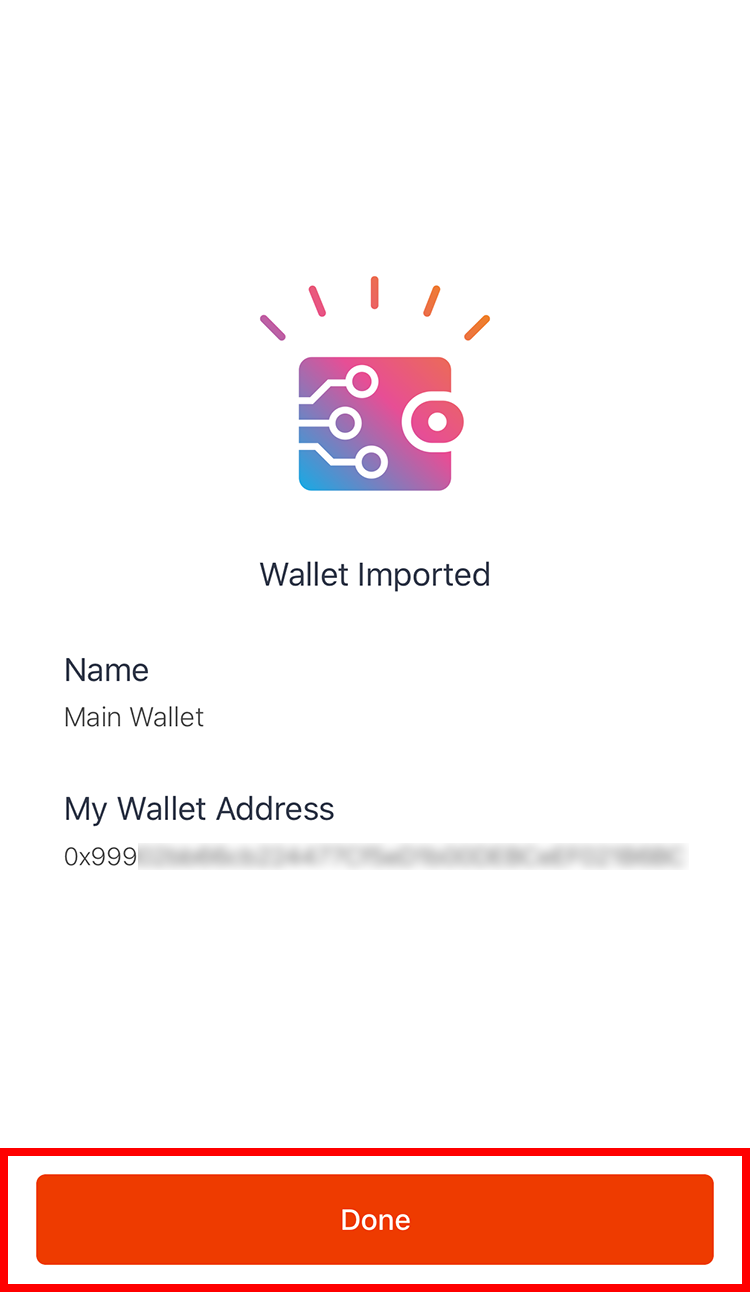
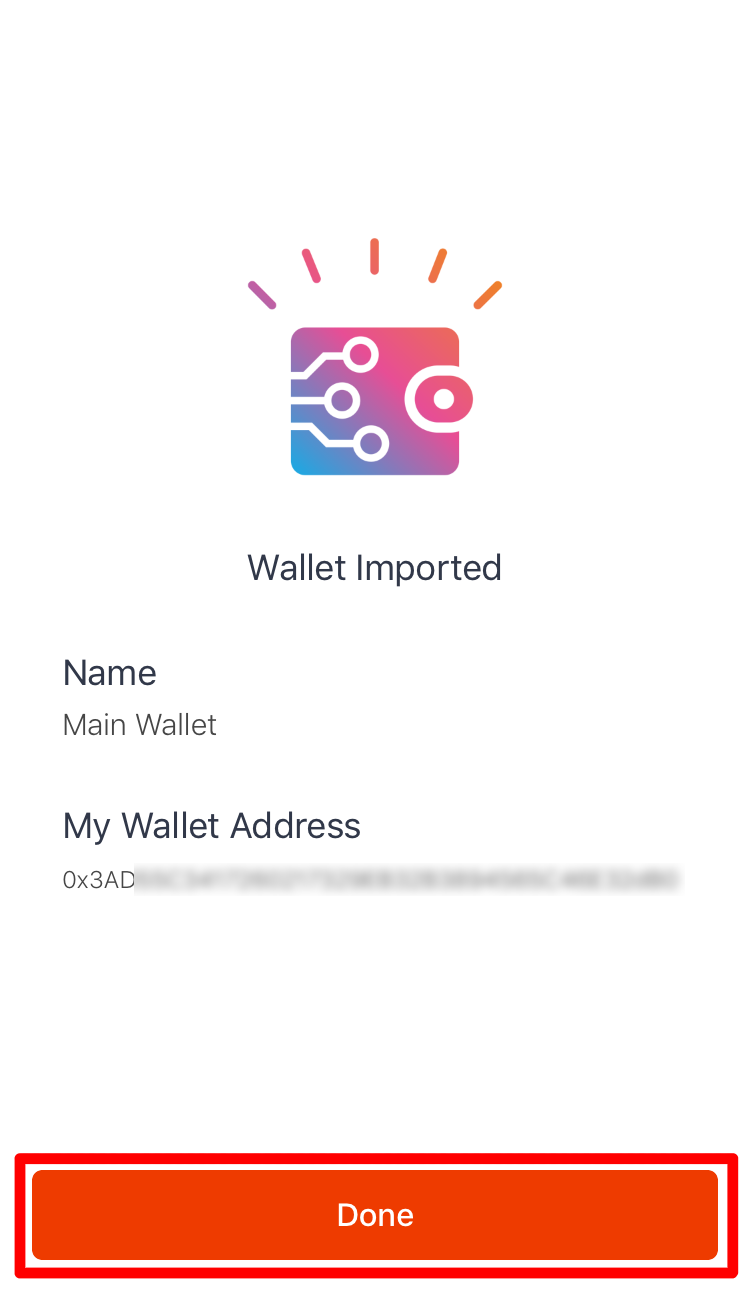
6. Tap “Done”.